The Place and Importance of Write and Seal Labels
Write and seal labels are underappreciated unless you work with them regularly. They are a foundational part of inspection and maintenance, thanks to their ability to communicate information swiftly.
However, you need to know how to use write and seal labels for them to function properly. If information is incorrect, for example, then they are rendered useless. Improper write and seal labels are a one-way road to poor maintenance and calibration.
Below, we discuss the importance of write and seal labels, as well as how to use them properly.
Write and Seal Labels: How They Work and What They Do
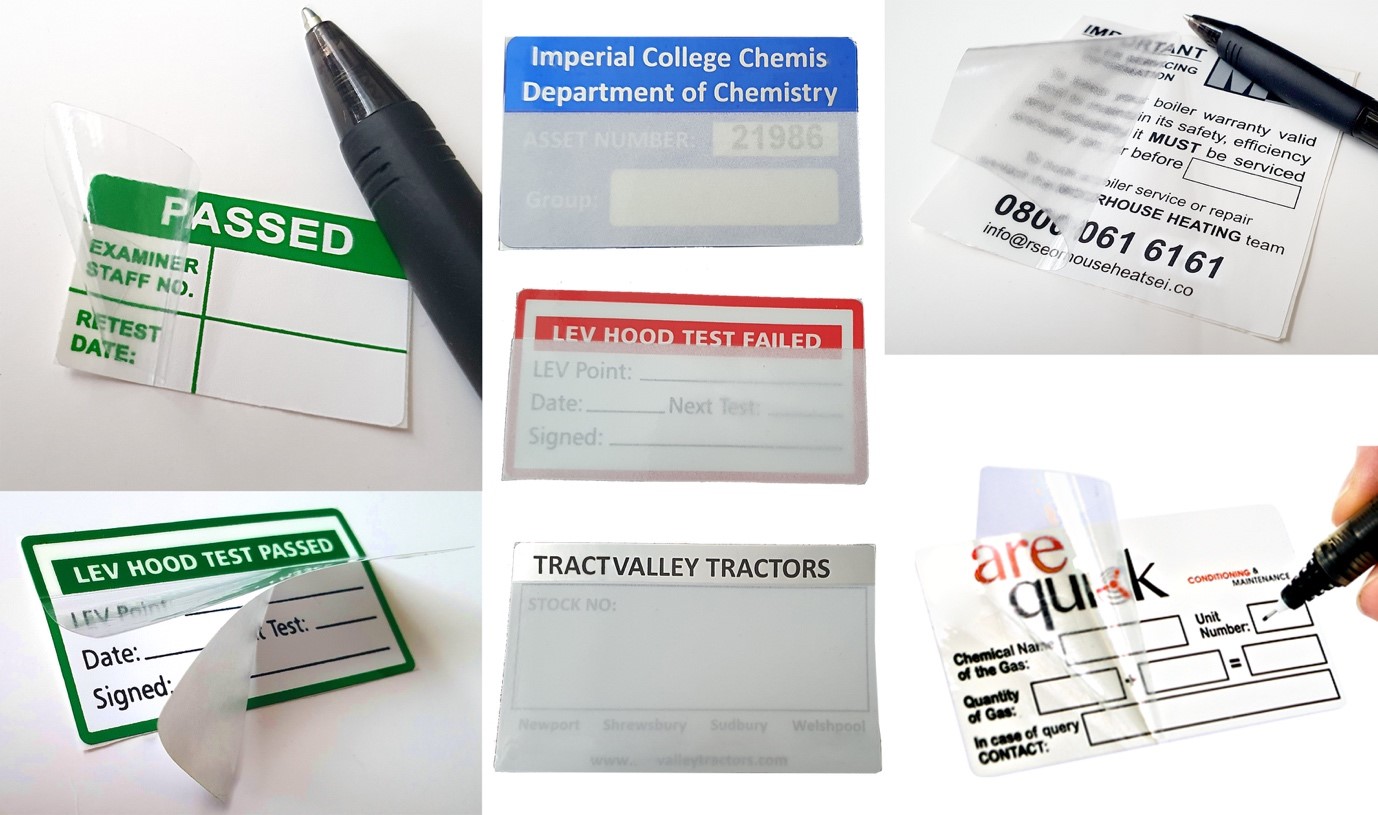
In total, you can purchase write and seal calibration labels, asset labels and PAT test labels. These look roughly the same, but will convey different information:
- Write and seal calibration labels contain the calibrator’s signature, date of calibration and when the next calibration is due.
- Write and seal asset labels communicate the asset number, which helps with asset tracking and theft prevention.
- Write and seal PAT test labels communicate when an electrical appliance has been tested, by whom and when.
This information is essential, helping to make sure specific equipment is safe and running as it should. These labels can be in place for several years, so they need to stay intact. How do they do this, you ask?
Well, the hint is in the name. Write and seal labels have a two-part construction made up of a base material and a laminate sheet. This means the label is written on, then sealed via laminate to keep it intact.
Without write and seal labels, it would be difficult to keep track of when key assets need maintenance. In fact, when you look at the number of industries that use these labels, you start to appreciate their utility.
Write and seal labels are used in the following industries:
- Hospitals and medical research
- Equipment numbering
- Pressure testing
- Maintenance and repairs
- Defence
- Marine
- Aerospace
No matter which industry write and seal labels are used in, though, they need to be used properly.
How to Use Write and Seal Labels
The first step is writing on the label. Ensure you use a marker that can be easily read, and print the information clearly.
A write and seal label usually contains three pre-printed phrases which dictate the information you need to write:
- “Signed”
- “Date”
- “Next Due Date”
All the information written on the label must be correct as it is difficult to amend this afterwards.
Following that, simply pull the laminate backing paper away and press it firmly down on the front of the label.
Finally, stick the write and seal label in a place that can be clearly seen. It’s an easy process but rushing it or making a mistake can have a negative knock-on effect.
Get High-Quality Write and Seal Labels Today
If you’re working with equipment that needs calibration or testing, then you can’t skip out on write and seal labels.
Get your write and seal labels today.